To help people with their Analytics I need access to their accounts and for those who don’t use the tool much sometimes it can not be very straight forward on how to actually do that and to give the access levels needed.
Let’s cover how to do it in as simplest a way as possible.
Adding a user to Google Analytics

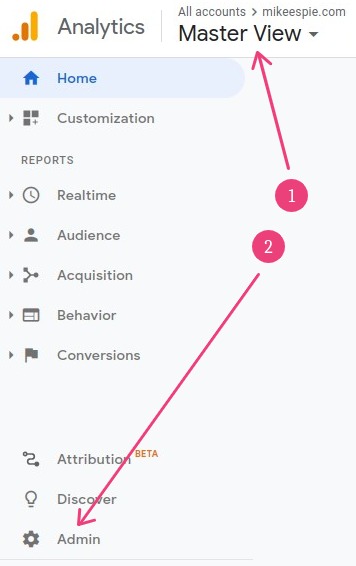
Go to https://analytics.google.com/ be in the Account and Property you want to share access to and then in the bottom left click gear icon to go to the admin section.
You will see this screen.
There are 3 levels you can give access a use to; Account, Property and View.
Account Level
The highest access meaning the person will have access to all the properties and views in the account.
Property level
This can be thought of as websites, one site should have one property so if your business has multiple sites (or apps) then these will be separate properties so you can give the person access to just one site and not everything in your account.
View level
The lowest amount of access and restricts the person from doing much at all, these are usually just for viewing purposes.
For access for me to work on an account I ask for Account Level access or at the very least Property Level if there are sites in their account they don’t want to share the access to.
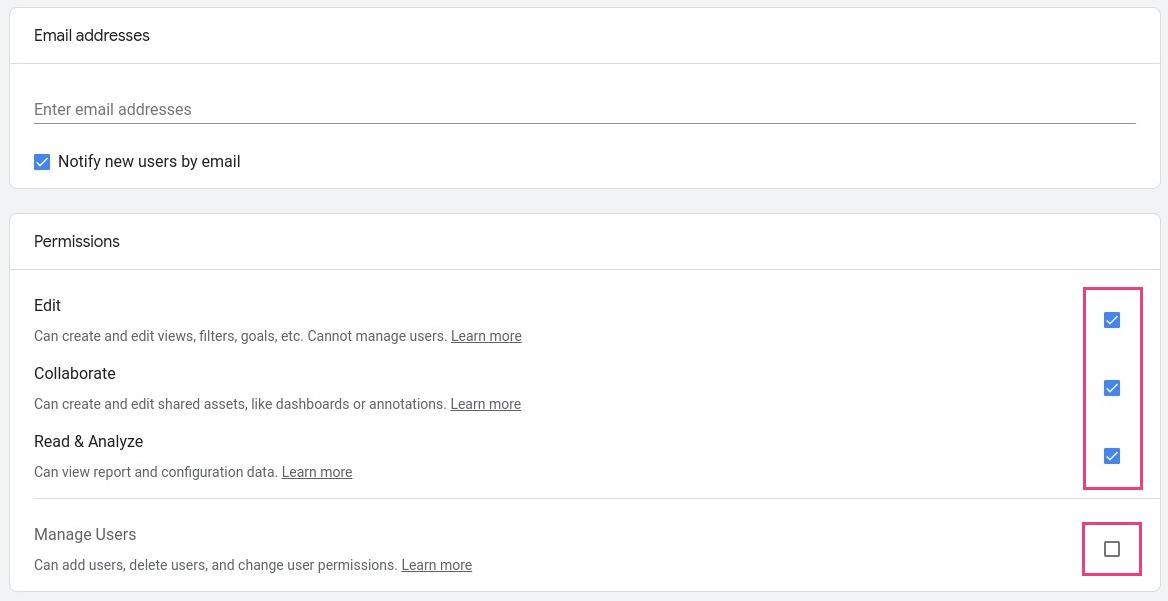
Once you decide which level access you want to give, simply click the User Management link in that column and then the Add Users option then you will see the below screen.

Choose if you want the person to be able to Edit the account which means to be able to change how it functions. The Collaborate option is for being able to set up custom reports etc but not do anything to the account. The Read & Analyze is purely to see the reports but not edit anything.
For me I always need Edit permissions to be able to make changes to the set up and get it working correctly.
Tip: I would recommend to never give someone Manage Users Permission, which is the equivalent to giving someone full ownership to your Analytics account. This should only be for the business owners or whoever looks after the website within the organisation.
Adding a user to Google Tag Manager
For 90% of cases when setting up conversion tracking with Google Analytics we need to use Google Tag Manager (GTM) to track the actions a user takes on the site.
If you already have an account here is how you add someone to it.
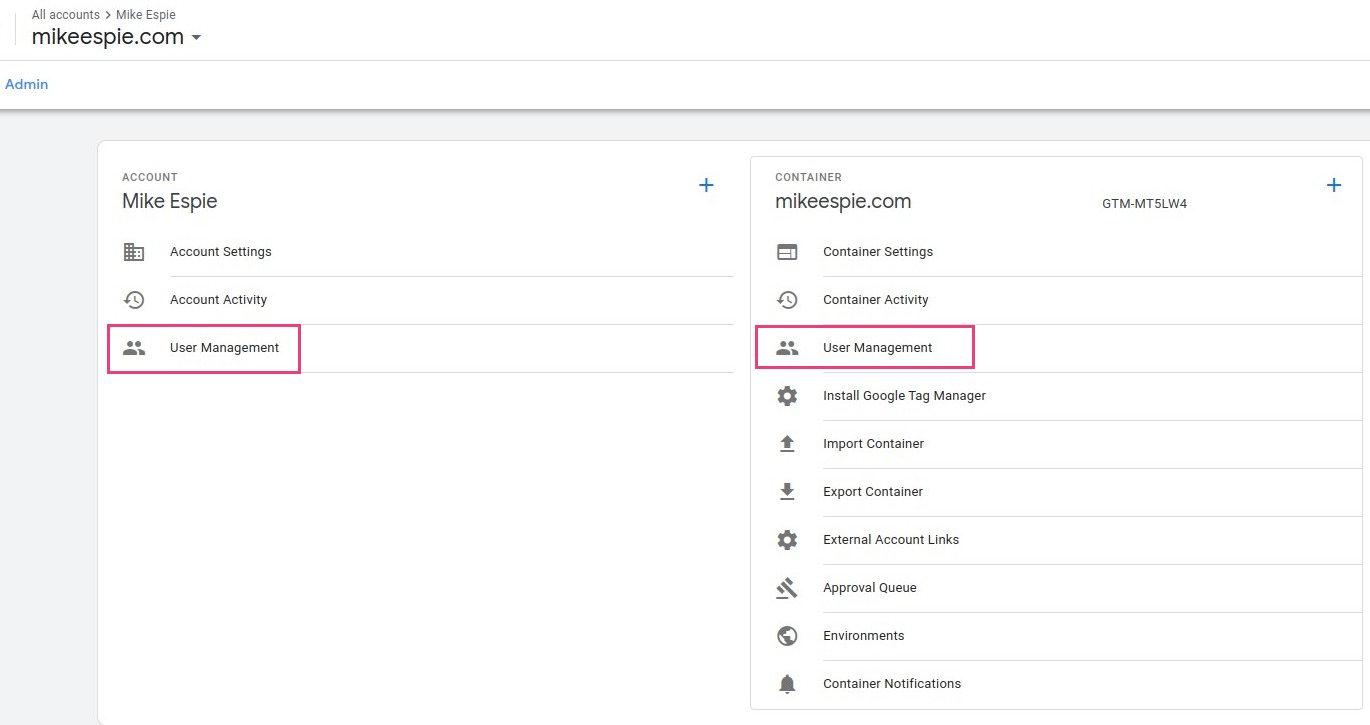
Go to https://tagmanager.google.com/ and you should have just one account show up so click on it and you will see the below screen.

This is just like I talked about above in Analytics, giving Account access allows the person to have access to everything. In GTM we have what are called Containers but you can think of them the same as ‘properties’ in Analytics where there should be one container per website.
For me I am usually working on one site so just having access to the Container is fine if the client doesn’t want to give Account access.
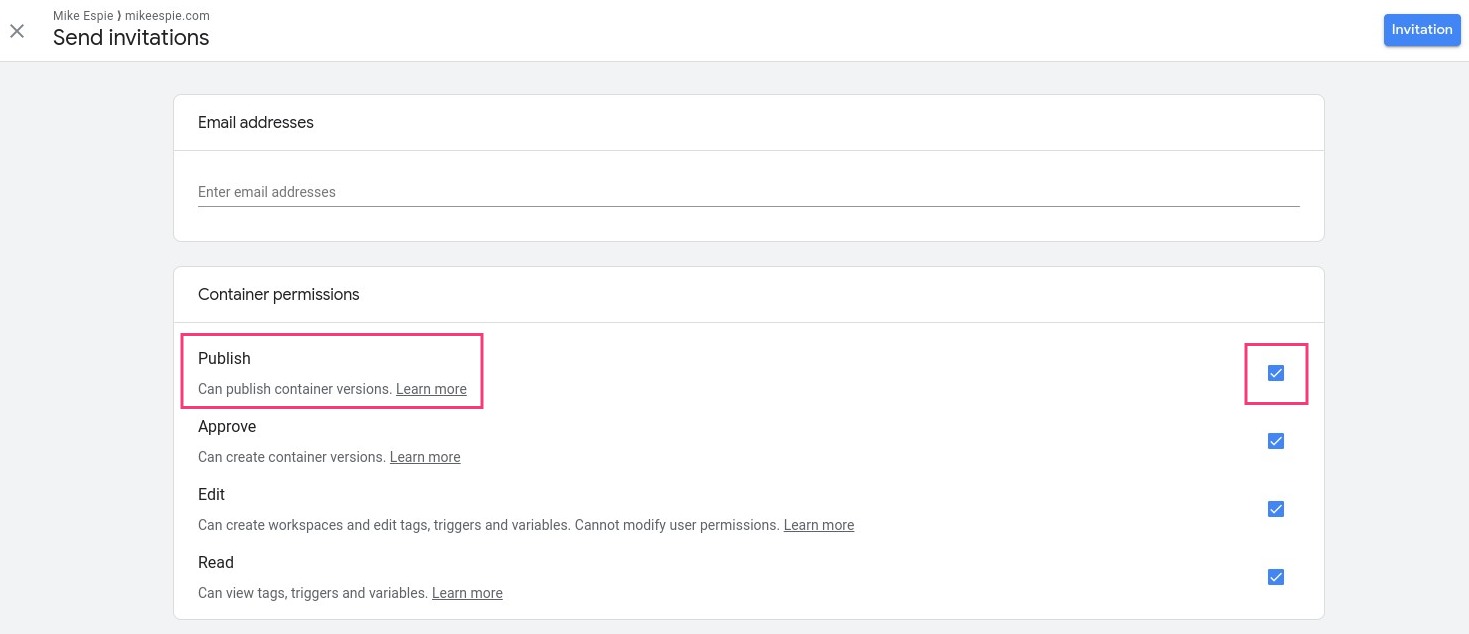
The key is when giving access to Tag Manager is giving the person Publish permission, rarely do you give some access to them just to look around usually they are in there to make edits and publish the container so the changes can take effect on the site.
I always need Publish permissions when working on an account so always ask for it.


Tag Manager is a set and forget type tool meaning that unless you are changing how your site works or features it has you shouldn’t need to go in there and it will happily keep working without any input. With that in mind it is good practice to limit the amount of people that have access to it as it is key to your analytics event/ecommerce tracking and so the less people that are able to affect that data the better.

